A. When it's a Beadalon Groovy Tube!
So, what's a Beadalon Groovy Tube, I hear you ask? Well, it's a crimp tube with grooves in the side that slightly spiral around the tube at an angle.
The grooves catch the light and create more sparkle than regular crimp tubes!
Beadalon recently gave me some to play with, along with some .024" wire so I'm going to share with you the Beadalon method of crimping.
I've blogged about how to crimp previously but this method might make it easier for you if you are struggling with it. Crimping is usually a 2-step process, but the Beadalon method is a 3-step process, with an additional step at the beginning. It's this first step that just might make your crimping nightmares go away!
Before we begin, take a look at the profile of your crimping tool. Notice the oval shaped hole at the tip?
This oval shaped slot is actually used in the first step of the crimping process. It shapes the round crimp tube into an oval prior to the actual crimping step. Who knew!
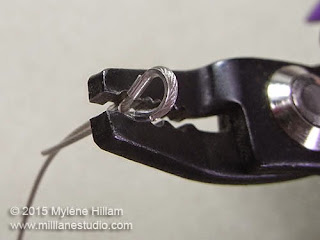
So let's take a look at the Beadalon 3-step crimping process. To start, string a Groovy Tube onto the beading wire, slip on a wire guardian and then thread the wire back through the Groovy Tube. Slide the tube up to the wire guardian, making sure the wires are sitting flat alongside each other rather than crossing over inside the crimp.
Step 1: Place the crimp inside the oval shaped hole at the tip of the pliers and squeeze the crimp to compress it into an oval shape.
Step 2: Place the Groovy Tube into the hole with the notch in it. If your crimping pliers have three holes, you'll be using the middle one which is sized for 2mm crimps. Make sure the wires haven't crossed over each other and squeeze gently to form the two wings that the wires sit in.
At this point, I like to check that the wires are securely encased, so give each one a good tug separately. If they're not secure, place the crimp back in the notched hole and squeeze more firmly.
Step 3: Return the Groovy Tube to the first hole (the one closest to the tip), turning the tube on its side, with the indentation facing towards the hinge of the pliers, and squeeze to bring the two wings together in the centre.
And you're done!
There is definitely a little more sparkle in a Groovy Tube compared to a regular crimp tube.
But the thing I noticed most was that because of the grooves, the walls have a little bit of extra thickness and seem to have more substance than ordinary crimp tubes. That should make it a stronger crimp!
So if you've been struggling with the crimping technique, give this method a go. Hopefully, the extra step will make all the difference!
'Til next time.....

If you can't get enough of My Tutorials and you want even more inspiration, click here to find my books and printable pdfs


No comments
Post a Comment