"Romantic and elegant" was the brief the Creative Bride gave me. She has chosen the mismatched look for her bridal party so each of her attendant's will wear a different shade of burgundy in a different style.
It's a broad brief but armed with information about what the bridesmaid's will wear, I had a starting point. With four different necklines, necklaces were ruled out. We toyed with the idea of a brooch but Michaela wanted to surprise her attendants with a faux fur wrap in case the day was chilly. So instead, we settled on a bracelet and pair of earrings for each bridesmaid. Now it was up to me to create something romantic and elegant. And what could be more elegant than crystals and gold filigree. So today, let's take a look at the bracelet.
There are a lot of steps in this project so I've split it into 2 posts. This first part deals with creating the epoxy resin and crystal focal. Part 2 shows how to put the bracelet together.
Here's what you'll need:
- Gold marquis claw setting (31x17mm)
- Raw brass filigree oval
- Garnet Swarovski Oval 10x14mm (no hole)
- Two 7mm Siam flat bicones
- Two 7mm 2-loop round setting
- Two 3-tiered bow filigree connector
- Sixteen small Indian Siam Swarovski flatback crystals
- Two gold eye pins
- Eight 3mm gold jump rings (not all shown)
- Gold foldover clasp (not shown)
- ETI EnviroTex Jewelry Clay
- Aztec Gold PearlEx powder
- Soft paint brush
- Drill with grinding/abrasive bit and 1mm drill bit
- Flat nose plier
- Round nose plier
- Flush cutter
- Button shank remover
- Embellie Gellie or Krystal Katana to help with placement of small crystals
- Methylated spirits (denatured alcohol) and a cotton bud
Fit a grinding bit to the drill and file the cut edges smooth.
They should be flush with the upper edge of the setting.
Trim away the pendant loop on the brass filigree using a button shank remover.....
and then the internal loop.
Trim away all the filigree from the inner oval. This is so the oval crystal will fit.
File the cut edges smooth.
Expand the sides of the marquis setting to fit the oval filigree.
Check it for fit and make any further adjustments if necessary.
Insert an eye pin through one side of the setting and out the other. Bend the eye pin at a 90° angle and trim to 8mm (5/16").
Turn a simple loop.
Repeat with a second eye pin through the other two holes.
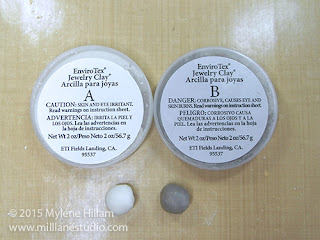
I'm using ETI's EnviroTex Jewelry Clay to fill the marquis setting. Measure out equal parts of A and B.
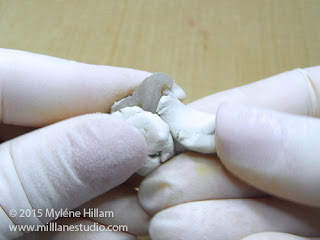
Put on a pair of gloves and mix the two parts together following the manufacturer's instructions until it's completely mixed.
Add some gold PearlEx powder to tint the resin and mix it in well. This step is optional as you can colour the surface of the clay when the piece is finished.
Shape the Jewelry Clay into a pointed oval and place it into the setting. Make sure the face of the eye pin loops face upwards.
Work the resin clay out to the edges and leave it domed in the centre.
Place the filigree on top of the Jewelry Clay and press it into the surface.
Position the oval crystal in the centre and press it down so that its girdle is level with the clay.
Place the small Swarovski crystals in the open areas of the filigree. I prefer to use pointy backs (aka V-backs, diamond backs and chatons) but to get the colour I needed, I had to settle for flatbacks. These will be just as secure because EnviroTex Jewelry Clay is an excellent adhesive.
Dust the surface of the resin clay with Pearl Ex. Don't worry if you get it on the crystals as you can brush it off.
Sometimes, no matter how careful you are, residue from the clay gets on the surface of the crystals. If this happens, clean it off with a cotton bud dipped in methylated spirits. You need to wipe it off before the clay goes off or it will be permanent.
Set the focal aside to cure for 24 hours before putting the bracelet together.
In my next post, we'll be using the remaining components to create the bracelet.
'Til next time.....

If you can't get enough of My Tutorials and you want even more inspiration, click here to find my books and printable pdfs


No comments
Post a Comment