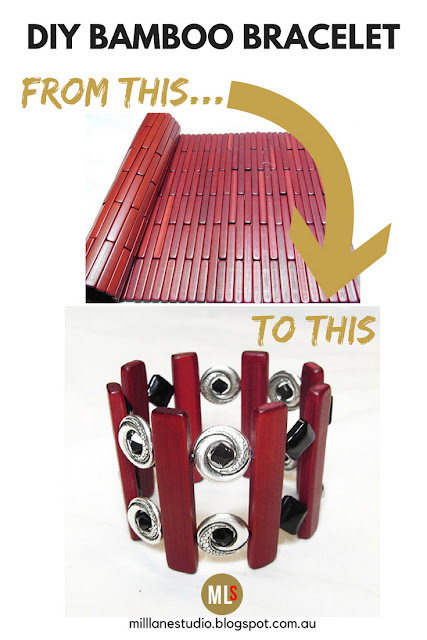
You'll Never Guess What This Bracelet is Made From!
This eye-catching bracelet is sure to surprise you. It's made from wood, metal and glass beads - a really striking combination. But there's something a bit out of the ordinary about this bracelet. Those long red wooden beads are rather interesting. And you're probably thinking that you've seen them somewhere before but can't quite put your finger on what it is that's so familiar about them. Have you worked it out yet? No?
Well, keep scrolling down the page.... and I'm sure you'll recognise them straight away.
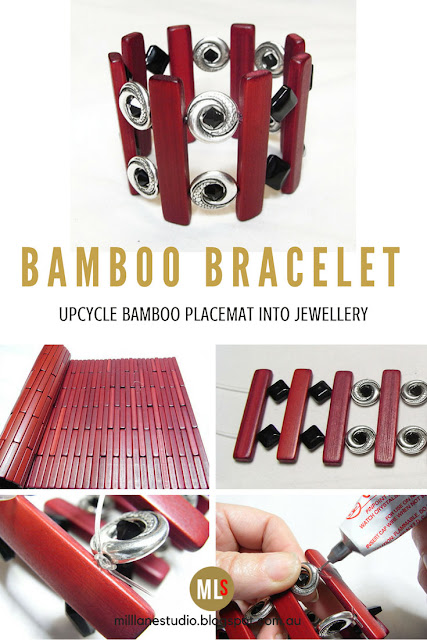
Did you guess? The wooden beads are actually from a bamboo placemat that you can find at your local kitchenware or dollar store. What an ingenious upcycle!
If you'd like to make a placemat bracelet of your own, here's what you'll need:
Bamboo placemat
Eight 14mm silver donut beads (with 7mm internal diameter)
Eight 6mm 'Jet' Black bicone crystals
Eight 10mm black diagonally drilled square beads
Stretch Magic 1mm Beading Cord
G-S Hypo Cement
Scissors
Begin by unravelling the placemat. You'll need eight of the short bamboo sticks. You'll find these along the top and bottom rows of the placemat.
Cut two 30cm (12") lengths of Stretch Magic and pre-stretch each one. This will help minimise overstretching the bracelet with wear.
On each piece of elastic, string the first hole of a donut bead. Then string a bicone on each one and pass the elastic through the second hole of each donut bead. Thread one elastic through the top hole of a bamboo bead and the other through the bottom hole. Repeat.
String a square bead on each piece of elastic and then add another bamboo bead. Repeat.
Repeat these first two steps once more.
Bring the two ends of the bracelet together and tie both ends of the top elastic together in a half knot.
Tie another knot in the elastic to secure. Tie the bottom elastic off in the same way.
Trim the knots to 6mm (1/4").
Pull the knots tight by holding the cut ends between your fingers and pulling them in every direction to tighten.
Apply G-S Hypo Cement to each of the knots for added security and allow it to dry.
Once the adhesive is dry, slide the knot inside the bead to hide it.
And you're done!
'Til next time.....

If you can't get enough of My Tutorials and you want even more inspiration, click here to find my books and printable pdfs
Repeat these first two steps once more.
Bring the two ends of the bracelet together and tie both ends of the top elastic together in a half knot.
Tie another knot in the elastic to secure. Tie the bottom elastic off in the same way.
Trim the knots to 6mm (1/4").
Pull the knots tight by holding the cut ends between your fingers and pulling them in every direction to tighten.
Apply G-S Hypo Cement to each of the knots for added security and allow it to dry.
Once the adhesive is dry, slide the knot inside the bead to hide it.
And you're done!
Pin this project!
'Til next time.....

If you can't get enough of My Tutorials and you want even more inspiration, click here to find my books and printable pdfs


No comments
Post a Comment