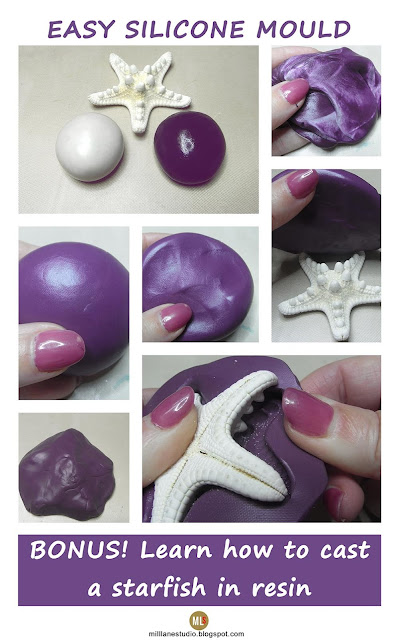
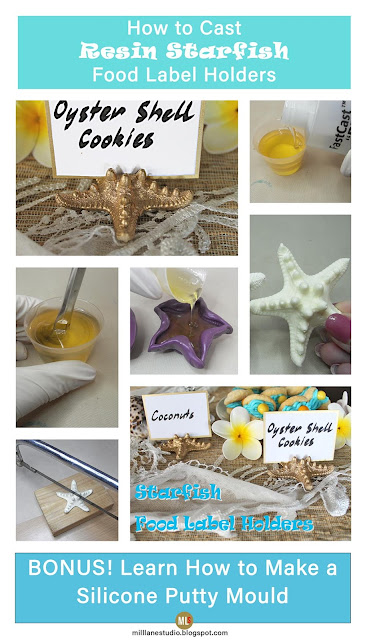
For an upcoming birthday celebration, I want to use starfish as food label holders to place in front of the platters on the food buffet but I only have one starfish so today I'm going to make a mould of it so that I can cast as many as I need. When you need to reproduce an object in quick time, then EasyMold Silicone Putty is a great choice for making your mould.
There are three parts to this tutorial: making the mould, casting the starfish in resin and finally, colouring the starfish.
Make the Mould
For this part you'll need EasyMold Silicone Putty and a starfish. You have just a few minutes to work with Silicone Putty so make sure you work quickly. Measure out equal quantities of the putty, making sure that you have enough to cover the starfish or object that you've chosen.
Place the two parts together and begin to blend them.
Keep mixing them until the putty is uniformly coloured and there is no streaking.....
and then roll it into a ball.
Flatten it so that it is large enough to fit over the starfish.
Centre the putty over the starfish.....
and push the putty onto the surface making sure you press it all the way around to pick up all the detail. Try to keep the mould at least 6mm (1/4") thick, especially over the high points so that they don't make a hole. Now leave the mould to cure for 25 minutes.
Once it's cured, you'll be able to easily remove the starfish by gently pulling the putty away on all sides.
PIN THIS IDEA!
Cast the Starfish
Note: I've found it best to leave the mould for 24 hours if you want to cast resin into it or you will end up with a very rough surface because of the gas that is given off whilst the putty is curing. If you're working with clay though, it's OK to use your mould straight away.I'm casting with Castin'Craft's FastCast urethane resin. It's fast curing so it's perfect when you need a quick result. You have only a couple of minutes from the time you pour the two components together until it begins to gel, so you have to work quickly. We won't be adding any colourant to the resin because it cures white.
For this part you'll need the mould you made, FastCast, measuring cups and stir sticks or an acid brush. I've found these work better than a stir stick when you're mixing small amounts of FastCast.
Measure out equal quantities of Parts A and B.
The package instructions contain thorough instructions for mixing the resin but briefly, you need to stir thoroughly for at least 30 seconds, using either a disposable brush or a wooden stir stick, then pour the resin into a clean cup and use a clean brush/stir stick to mix it for another 30 seconds.
Pour the mixed resin to the top of the mould.
Now, sit back and watch it change from translucent to white......
....right in front of your eyes!
It will only take around 10-15 minutes to harden depending on your room temperature. To remove the cast from the mould, just gently pull back the silicone on all sides and pull the starfish out.
Here's the original starfish on the left and the cast resin piece on the right.
Make the Food Label Holders
Cut a slit across the top with a coping saw, just wide enough and deep enough to sit a card in.
And then to give the starfish an opulent look, spray paint it with gold paint. I used a bright gold.
Freshly painted.....
And now it's ready to serve!
These starfish food label holders are perfect for a Hawaiian themed buffet. I'm really happy with how they've turned out.
I'll be posting more Hawaiian themed party decor in the coming months, so keep an eye out.
Pin this for later!
'Til next time.......

If you can't get enough of My Tutorials and you want even more inspiration, click here to find my books and printable pdfs


No comments
Post a Comment