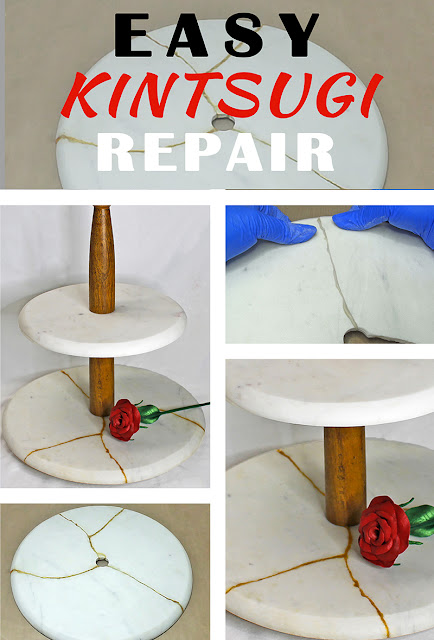
Wabi-sabi – the art of finding and embracing the beauty in imperfection.
Kintsugi – the traditional Japanese technique of repairing broken pottery.
In our materialistic society, it's easy to throw away broken objects and replace them with something shiny and new. But Kintsugi allows us not only to restore usefulness to a broken object but also to find the beauty in that object’s life story, reminding us that nothing is permanent, perfect or complete. And with that in mind, I’m going to repair a broken marble cake stand and give it a new life and beauty of its own.
Traditionally, resin lacquer and gold powder are used to repair broken pottery, but in this modern take on the traditional method, I'll be using epoxy resin clay instead because it’s strong adhesive properties will hold up well on heavy marble.
Here's what you'll need to do a repair like this:
- EasySculpt epoxy resin clay
- Aztec Gold Pearl Ex
- Soft paint brushes
- Basic sculpting tools
- Talcum powder
- A sharp blade
- Methylated spirits (denatured alcohol)
- Several Cotton buds (Q-tips)
- Gloves
How to do a Kintsugi-inspired Repair
Before you begin, lay out all the pieces to see how they fit together (and whether or not there are any pieces missing).
Tip:EasySculpt is quite sticky when you first mix it so make sure you put on your gloves before you begin. Give them a dusting with talcum powder whenever the clay begins to stick to them but take care not to over-powder them or it will be absorbed into the clay and dry it out.
Measure out equal quantities of Parts A and B. You won’t need very much.
Mix the two parts together thoroughly, blending them until they uniform in colour.
Break off a small piece and flatten and lengthen it until it's the same length as the two pieces you want to join together.
Align the two pieces and press them together firmly until the excess clay squeezes out.
Scrape away the excess clay on the front as well as the back.
Run a pointed clay tool through the clay to create a channel which you will fill later. Leave the clay to dry overnight.
Next day, mix up another small batch of EasySculpt and press it into the channel to fill the gap. Smooth out the clay and wipe away the excess.
Whilst the clay is still moist, brush the Pearl Ex onto the clay. Leave it to cure until it has hardened.
Use the blade to scrape away any excess clay outside the seam. Take care not to scrape away any of the gold from the actual join.
Take a cotton bud dipped in methylated spirits and do a final clean up of the edges. Keep rotating the cotton bud so that you are always working with a clean part of the swab.
Leave the completed repair to cure fully before using it.
No doubt this marble cake stand has past tales to tell of fancy afternoon teas and the delicious morsels it once held........ but here's looking to the future and all the sweet and savoury delicacies still to come.
Oh, and one thing to keep in mind: whilst this is a really sturdy repair, food should not come into direct contact with epoxy clay. I’ll be using a doiley between the marble and the food, which will also help prevent grease and oil from absorbing into the marble.
Like this idea? Pin it for later!
'Til next time.......

If you can't get enough of My Tutorials and you want even more inspiration, click here to find my books and printable pdfs


No comments
Post a Comment