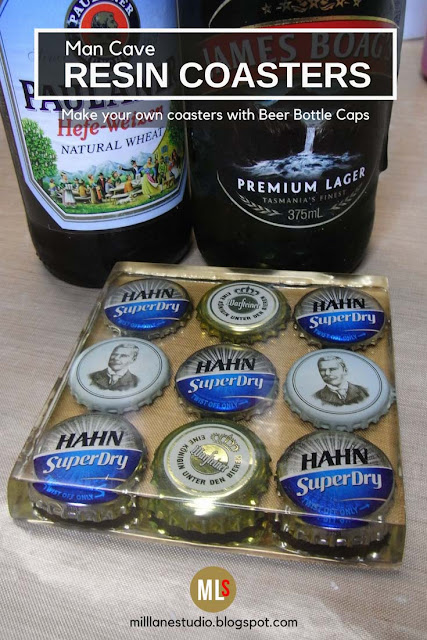
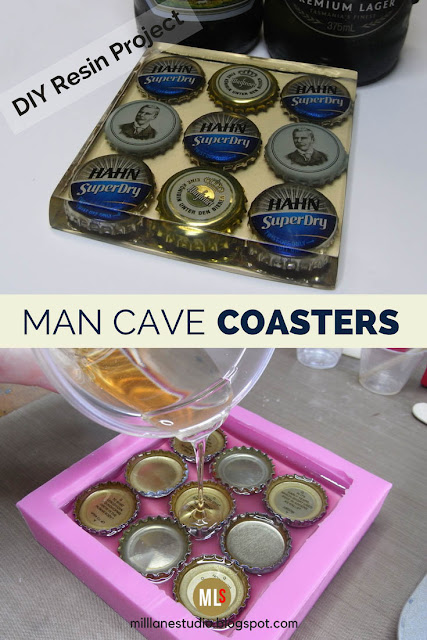
Beer bottle caps would have to be THE perfect item to embed in coasters for guys in their early 20s (or maybe any age!). My son has been collecting bottle caps for this project for months and I've been busting to get started on it. So whilst the silicone mould was curing, I began by preparing the bottle caps.
I started by filling them with resin.
I'm so glad I did this before setting the caps into the resin because a few bubbles got caught around the rubber lining of each cap and it was easier to pop them before they were set into the coaster mould rather than after. It also made them heavy enough so they didn't float to the surface when I filled the mould.
As soon as the silicone was cured I was able to start pouring resin into the mould - just a shallow layer to begin with. Once this was at the soft cure stage, I lined up the bottle caps in the mould as best I could. It was a bit tricky because they're upside down in the mould and you can't see if they're straight.
One or two of them ended up twisted a little bit but it still looks OK. One final layer of resin covers all the bottle caps.
This first coaster was a test run to see if I've poured in enough resin, whether the mould was deep enough and also to work out how much resin I'll need for each coaster. The mould passed on all fronts.
All that's left to do is to add some silicone feet to the bottom and it's ready for use!
These make great gifts for the men in your lives. What Dad wouldn't love it if you'd handmade a set of these just for him!
Buy a Resin Beer Bottle Top Coaster kit to make your own set of coasters.
Pin this project for later!
'Til next time.....

If you can't get enough of My Tutorials and you want even more inspiration, click here to find my books and printable pdfs


No comments
Post a Comment