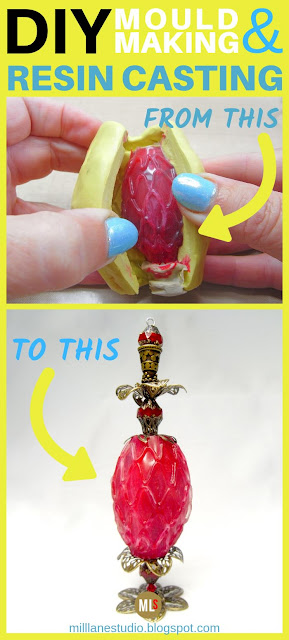
Over the past month I've shared a few of my resin jewellery-making ideas with you as the Featured Artist on the Amazing Casting Products blog. But resin doesn't have to be reserved only for jewellery - it is equally suitable for creating home decorator items. The starting point for my final project, the "Inspiration Post", is a beautiful Egyptian Perfume bottle that I'll be recreating in resin.
I was a bit nervous undertaking this project because I had no idea if I’d be able to remove my precious bottle from the Mold Putty once it had cured. But I took a deep breath and proceeded anyway!
Here’s what you’ll need to create the mould for the central bead:
Here’s what you’ll need to create the mould for the central bead:
- Amazing Mold Putty
- Egyptian perfume bottle
- Alumilite Clear Casting Resin
- Alumilite Red Dye
- Alumilite Black Dye
- Alumilite gold metallic powder
- Sulphur-free Plasticine
- Wooden stir sticks
- Soft bristle brush
- Rubber bands
- Ruler and permanent marker
- Rigid florist wire
- Assorted crystals and beads
- Assorted filigrees, bead caps and cones
- Tools: Drill with 1.5mm drill bit, flat nose pliers
, round nose pliers
, memory wire shears
, Tonic Studios Tim Holtz scissors
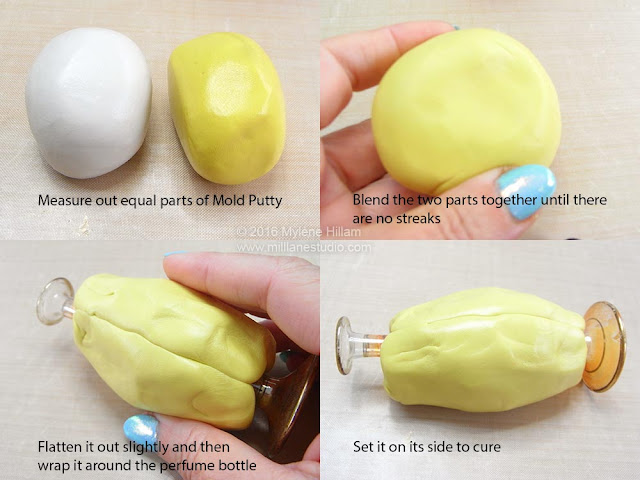
This bottle stands at 10cm (4”), so it’s quite a large amount to mix and you have to work fast to blend it. Flatten it out into a rough circle and then wrap it around the bulbous part of the bottle, making sure it's pressed right against the glass so you get a good impression. You can see the seam where the two sides meet. Make sure that they are well joined so the mould will be leak proof along the seam. And then set it on its side to cure.
You will probably need to trim the bottom of the mould with the knife to level it.
Because the mould is open-ended it needs to be plugged at the trimmed end with plasticine. The plasticine also acts as an adhesive to make sure that the mould stays firmly upright whilst you're pouring the resin.
The final step in preparing the mould is wrapping it tightly with rubber bands to make sure it’s water tight (or rather, resin-tight!). Mix and colour the resin according to the package instructions and pour it into the mould. For this first piece, I coloured the resin with Alumilite red dye.
It’s always exciting to see your first cast out of a mould and this one is no exception. As expected, the Clear Casting Resin has picked up all the detail from the mould. One thing I learned from the first piece I cast is that this mould needs to be filled very slowly to avoid air pockets getting trapped in the lattice detail. My second and third pours were much more successful because I dripped the resin into the mould and allowed it to slowly rise up inside.
So now you have these fabulous bulb-shaped beads. But to turn them into bottle components, they need holes. I used a Dremel with a 1.5mm drill bit on very slow speed – first from one end, and then the other, with the aim of meeting in the middle.
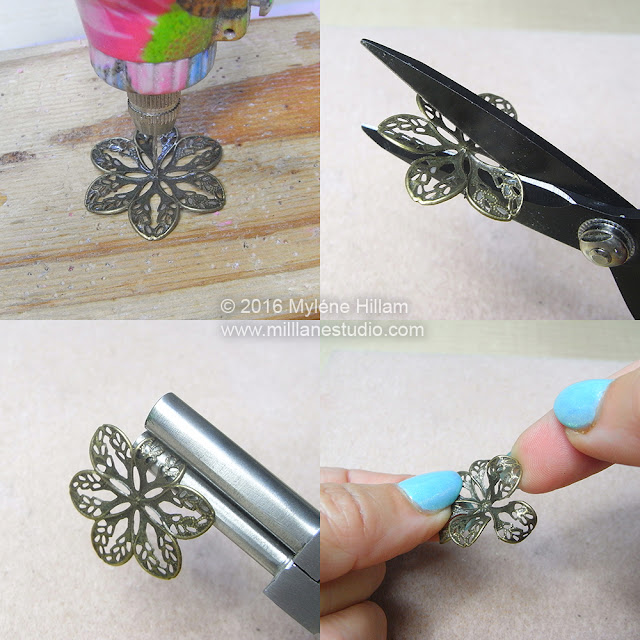
Before assembling the Faux Egyptian Perfume bottles, prepare some flower filigrees by drilling a stringing hole, cutting the petals apart and shaping them. I used Tim Holtz Tonic Studio scissors because the micro-serrated edge will easily cut through thin metal stampings.
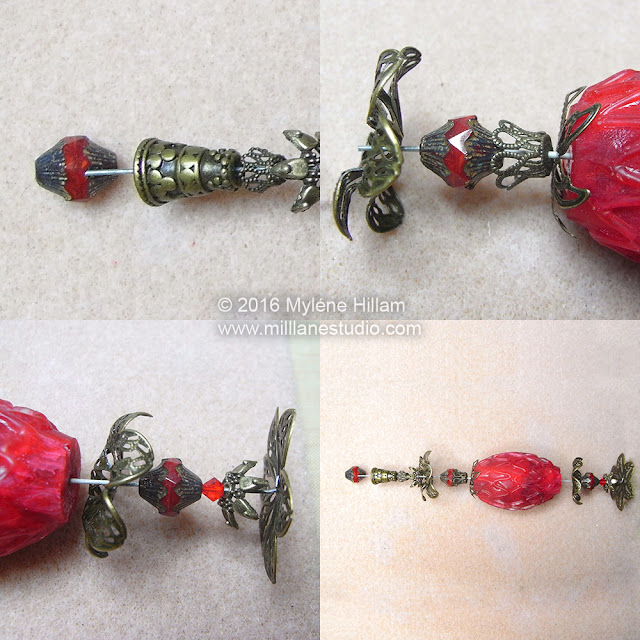
Now it’s time to raid your findings stash to find components that will help you recreate a life size Faux Egyptian perfume bottle. The idea here is to combine bead caps in different sizes and shapes with a smattering of beads and crystals to represent the decorative elements of the stem and the perfume dropper.
Once you're happy with the balance of the components (and it looks like a perfume bottle) make sure that each component is nesting snugly inside the one above and below it and that there’s no play in the finished piece. If they don't fit snugly, or they slide around inside each other, the finished bottle will sit crookedly. Create a simple jewellery-making loop as close to the top bead as you can to securely finish them off.
Tip: Using rigid florist wire rather than regular jewellery-making wire gives the bottle a strong core so the bottle will stand upright on its own.
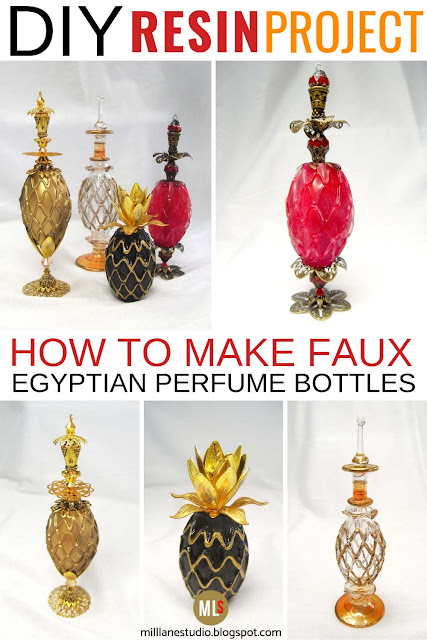
To create the gold version, I dusted the inside of the mould thoroughly with Gold Metallic Powder and coloured the resin with black dye.
The Pineapple bottle was cast with black resin and the lattice was highlighted with a Krylon Gold Leafing pen. The leaves are created by stacking petal bead caps inside each other.
My resin bottles make a wonderful grouping together and would look lovely on a dressing table.... perhaps a beautiful gift for your mother on Mother's Day. You may not have an Egyptian Perfume bottle of your own but take a look at what collectables you do have and see what might be worthy of reproducing in resin.
For more inspiration, please join me on Facebook or visit my website for resin workshop information.
Pin this Project Idea!
Pin this - How to Make a Mould!

If you can't get enough of My Tutorials and you want even more inspiration, click here to find my books and printable pdfs







No comments
Post a Comment