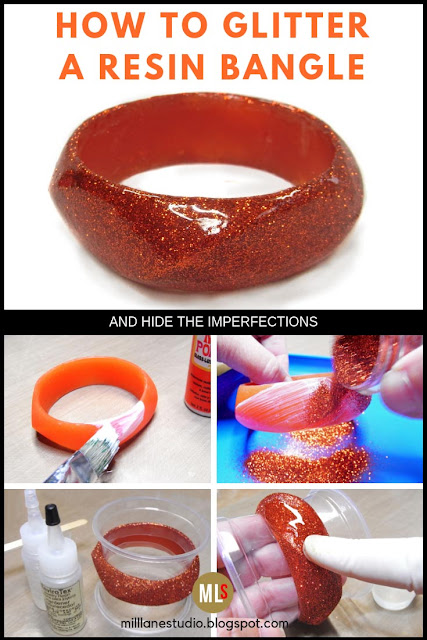
Notice the white spots on the top of the bangle in the photo below? Well, sometimes when you're working with resin, things don't turn out quite like you'd hoped - this bangle was one of those occasions. But those imperfections make it the perfect candidate for this treatment.

I won't go in to what caused the white spots but instead I want to show you a way of disguising them. And seeing as it is Halloween this week, an orange bangle is ideal for the glitter treatment.
For the first part of this project you'll need a resin bangle, Mod Podge, glitter (I chose a shade of pumpkin), a tidy tray to catch the glitter and a paint brush.
Paint the bangle with a coat of Mod Podge working in small sections at a time. The wonderful thing about Mod Podge is that even though it's water based, it will stick to the resin..... amazing! But beware..... if you don't clean up your brush with water straight away, it will permanently stick to your brush too.
Sprinkle glitter on the Mod Podge, using the tray to catch the excess and then repeat all the way around the bangle.
Wow..... love this look!
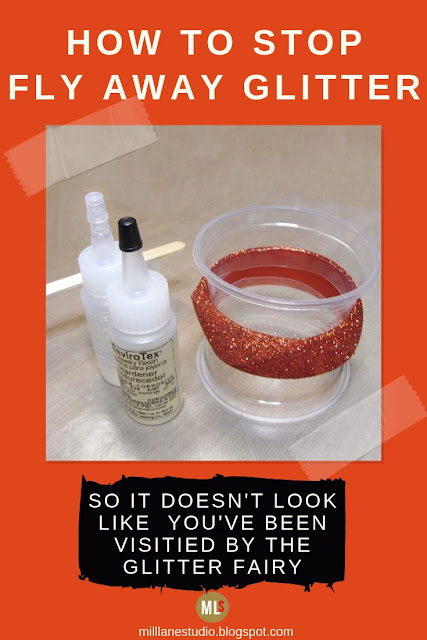
But whilst it looks pretty, you'll look like you've been visited by the glitter fairies unless you seal it. Let the Mod Podge dry for several hours before proceeding.
For the second part of the project you'll need resin. I chose EnviroTex Jewelry Resin because it's really clear and it's perfect for applying as a coating. For a project of this size you only need about 5mls but I find there is less chance of getting the measurements wrong if you mix up more than 2.5mls of each part. You can always use the left over resin on another project but just have that project ready to go.
Here's what you'll need:
EnviroTex Jewelry Resin
2 measuring cups
2 plastic party cups
wooden stir sticks
disposable glove
utility knife
The first thing I like to do is cut the top off my plastic party cups. Keep the bottoms for another resin project. The rims make a great stand for the bangle so that you don't get resin all over you whilst you're working. You'll see what I mean later on. Turn one of the cup rims upside down and place the bangle on it.
Insert the second cup rim inside the bangle and now it's nice and sturdy and can be handled without getting resin all over you. Mix up 10mls of resin, following the manufacturer's instructions carefully.
Paint the resin on with a gloved finger. You can use a paint brush for this but you will have to throw it away afterwards.
Place the cup stand back on the bench. The excess resin will drip down the stand and pool in the lip of the rim.
After 5 minutes, turn the stand upside down, remove the rim which is coated with resin and discard it. Turning the bangle upside down will help the coat of resin even out but you may need to used your gloved finger to smooth out the surface completely. If you have any further drips at the bottom, use a toothpick to wipe away the excess so the bangle doesn't stick to the stand.
Leave it to cure for 24 hours. There will probably be some excess resin to be removed.
Carefully shave it away with the Stanley knife. If it is still rough, you can use 180 grit wet/dry sand paper to smooth it. Make sure you use it with water so that there is no dust to breathe in. Follow up with 400 grit if necessary.
And there you have it. A wonderfully sparkly glittered resin bangle and no imperfections in sight! It goes rather nicely with my spotted Halloween bangles too.
Try this fix on bangles that are filled with bubbles as well (if you try to pour polyurethane resin on a humid day, you'll be familiar with this problem!).
If you like this project, you might like this one too!
How to disguise Bubbles in a resin bangle
Pin this Project!
'Til next time.....

If you can't get enough of My Tutorials and you want even more inspiration, click here to find my books and printable pdfs


No comments
Post a Comment